1,基本用法
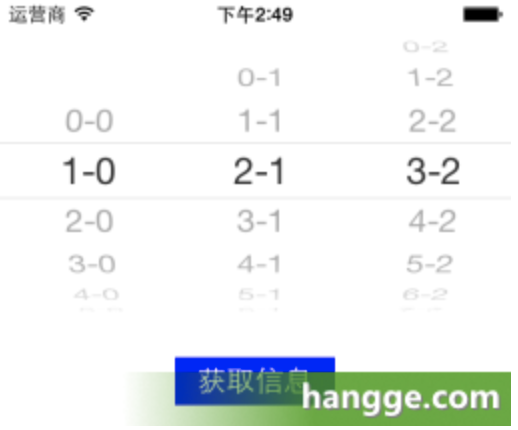
选择框可以让用户以滑动的方式选择值。示例如下:
import UIKit

class ViewController:UIViewController, UIPickerViewDelegate, UIPickerViewDataSource{

    var pickerView:UIPickerView!

    override func viewDidLoad() {
        super.viewDidLoad()
        pickerView = UIPickerView()
        //将dataSource设置成自己
        pickerView.dataSource = self
        //将delegate设置成自己
        pickerView.delegate = self
        //设置选择框的默认值
        pickerView.selectRow(1,inComponent:0,animated:true)
        pickerView.selectRow(2,inComponent:1,animated:true)
        pickerView.selectRow(3,inComponent:2,animated:true)
        self.view.addSubview(pickerView)

        //建立一个按钮,触摸按钮时获得选择框被选择的索引
        let button = UIButton(frame:CGRect(x:0, y:0, width:100, height:30))
        button.center = self.view.center
        button.backgroundColor = UIColor.blue
        button.setTitle("获取信息",for:.normal)
        button.addTarget(self, action:#selector(ViewController.getPickerViewValue),
                         for: .touchUpInside)
        self.view.addSubview(button)
    }
    //设置选择框的列数为3列,继承于UIPickerViewDataSource协议
    func numberOfComponents(in pickerView: UIPickerView) -> Int {
        return 3
    }

    //设置选择框的行数为9行,继承于UIPickerViewDataSource协议
    func pickerView(_ pickerView: UIPickerView,
                    numberOfRowsInComponent component: Int) -> Int {
        return 9
    }

    //设置选择框各选项的内容,继承于UIPickerViewDelegate协议
    func pickerView(_ pickerView: UIPickerView, titleForRow row: Int,
                    forComponent component: Int) -> String? {
        return String(row)+"-"+String(component)
    }

    //触摸按钮时,获得被选中的索引
    @objc func getPickerViewValue(){
        let message = String(pickerView.selectedRow(inComponent: 0)) + "-"
            + String(pickerView!.selectedRow(inComponent: 1)) + "-"
            + String(pickerView.selectedRow(inComponent: 2))
        let alertController = UIAlertController(title: "被选中的索引为",
                                                message: message, preferredStyle: .alert)
        let okAction = UIAlertAction(title: "OK", style: .cancel, handler: nil)
        alertController.addAction(okAction)
        self.present(alertController, animated: true, completion: nil)
    }
}
2,调整选择框的尺寸
UIPickerView 用 frame 和 center 两个属性设置整个选择框的大小和位置。
如果要调整内部列的宽度,需要实现 UIPickerViewDelegate 协议类中 pickerView:widthForComponent 方法设置
如果要调整内部行高,则需要实习上述协议类中 pickerView:rowHeightForComponent 方法设置
//设置列宽
func pickerView(_ pickerView: UIPickerView, widthForComponent component: Int) -> CGFloat {
    if(0 == component){
        //第一列变宽
        return 100
    }else{
        //第二、三列变窄
        return 30
    }
}

//设置行高
func pickerView(_ pickerView: UIPickerView, rowHeightForComponent component: Int)
    -> CGFloat {
    return 50
}
3,将图片作为选择框选项
选择框选项的内容,除了可以使字符串类型的,还可以是任意UIView类型的元素。比如我们将选项内容设置为图片:
func pickerView(_ pickerView: UIPickerView, viewForRow row: Int, forComponent component: Int,
                reusing view: UIView?) -> UIView {
    let image = UIImage(named:"icon_"+String(row))
    let imageView = UIImageView()
    imageView.image = image
    return imageView
}
4,检测响应选项的选择状态
func pickerView(_ pickerView: UIPickerView, didSelectRow row: Int,
                inComponent component: Int) {
    //将在滑动停止后触发,并打印出选中列和行索引
    print(component)
    print(row)
}
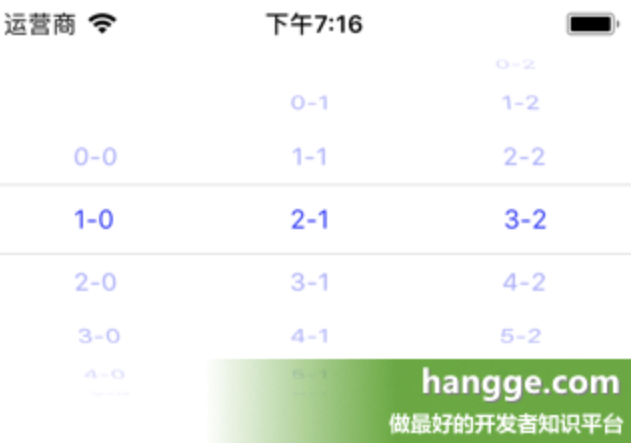
5,修改选项的字体大小和颜色
func pickerView(_ pickerView: UIPickerView, viewForRow row: Int,
                forComponent component: Int, reusing view: UIView?) -> UIView {
    var pickerLabel = view as? UILabel
    if pickerLabel == nil {
        pickerLabel = UILabel()
        pickerLabel?.font = UIFont.systemFont(ofSize: 13)
        pickerLabel?.textAlignment = .center
    }
    pickerLabel?.text = String(row)+"-"+String(component)
    pickerLabel?.textColor = UIColor.blue
    return pickerLabel!
}
6,SwiftUI中使用UIPickerView
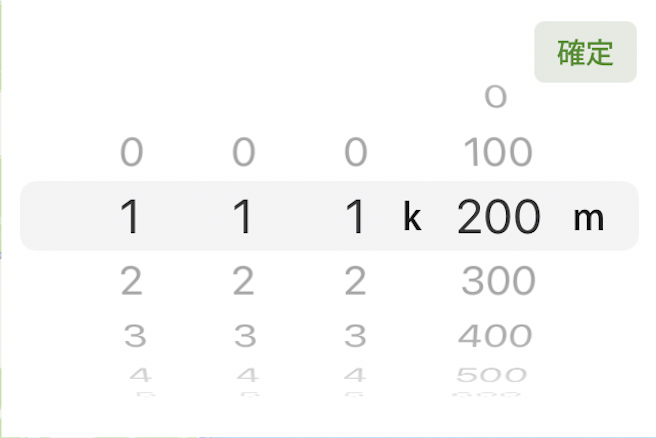
在SwiftUI中定义一个 UIPickerView
struct PickerView: UIViewRepresentable {

    @Binding var selectionText1: String
    @Binding var selectionText2: String
    @Binding var selectionText3: String
    @Binding var selectionText4: String

    func makeUIView(context: Context) -> UIPickerView {

        let view = UIPickerView()

        view.delegate = context.coordinator
        view.dataSource = context.coordinator

        view.selectRow(Int(selectionText1)!, inComponent: 0, animated: true)
        view.selectRow(Int(selectionText2)!, inComponent: 1, animated: true)
        view.selectRow(Int(selectionText3)!, inComponent: 2, animated: true)
        view.selectRow(Int(selectionText4)! / 100, inComponent: 3, animated: true)
        return view
    }

    func updateUIView(_ uiView: UIPickerView, context: Context) {}

    func makeCoordinator() -> PickerView.Coordinator {
        Coordinator(self)
    }

    class Coordinator: NSObject, UIPickerViewDelegate, UIPickerViewDataSource {
        var control: PickerView

        init(_ control: PickerView) {
            self.control = control
        }

        func numberOfComponents(in pickerView: UIPickerView) -> Int {
            return 4
        }

        func pickerView(_ pickerView: UIPickerView, widthForComponent component: Int) -> CGFloat {
            if component == 3 {
                return 80
            } else {
                return 50
            }
        }

        func pickerView(_ pickerView: UIPickerView,
                        numberOfRowsInComponent component: Int) -> Int
        {
            return 10
        }

        func pickerView(_ pickerView: UIPickerView, didSelectRow row: Int,
                        inComponent component: Int) {
            if component == 0 {
                self.control.selectionText1 = String(row)
            } else if component == 1 {
                self.control.selectionText2 = String(row)
            } else if component == 2 {
                self.control.selectionText3 = String(row)
            } else {
                self.control.selectionText4 = String(row * 100)
            }
        }

        func pickerView(_ pickerView: UIPickerView, titleForRow row: Int,
                        forComponent component: Int) -> String?
        {
            if component != 3 {
                return String(row)
            } else {
                return String(row * 100)
            }
        }
    }
}
struct KMPickerView: View {

    @Binding var selectionText1: String
    @Binding var selectionText2: String
    @Binding var selectionText3: String
    @Binding var selectionText4: String
    @Binding var selectedKilo: Bool

    var body: some View {
        ZStack(alignment: .trailing) {
            HStack {
                Button(action: {
                    withAnimation {
                        self.selectedKilo = false
                    }

                }) {
                    VStack {
                        Text("確定")
                    }.frame(width: 50, height: 30).cornerRadius(5)

                }.cornerRadius(5)
            }.zIndex(40).offset(x: -10, y: -80)

            Text("k").zIndex(40).offset(x: -115)
            PickerView(selectionText1: self.$selectionText1, selectionText2: self.$selectionText2, selectionText3: self.$selectionText3, selectionText4: self.$selectionText4).zIndex(30)
            Text("m").zIndex(40).offset(x: -25)
        }.frame(alignment: .trailing)
    }
}