配置TEKTON运行环境
1.安装Tekton Operator。在OperatorHub中找到“OpenShift Pipelines Operator”,然后安装。
2.安装Tekton客户端。
$ curl -LO https://github.com/tektoncd/cli/releases/download/v0.11.0/tkn_0.11.0_Linux_x86_64.tar.gz
$ sudo tar xvzf tkn_0.11.0_Linux_x86_64.tar.gz -C /usr/local/bin/ tkn
配置并运行TEKTON PIPELINE
1.创建项目。
$ oc get tekton-cicd
- 创建4个Task和Task-4用到的PipelineResource。
$ oc create -f https://raw.githubusercontent.com/liuxiaoyu-git/workshop4/master/attendee/tekton/task-1.yaml
$ oc create -f https://raw.githubusercontent.com/liuxiaoyu-git/workshop4/master/attendee/tekton/task-2.yaml
$ oc create -f https://raw.githubusercontent.com/liuxiaoyu-git/workshop4/master/attendee/tekton/task-3.yaml
$ oc create -f https://raw.githubusercontent.com/liuxiaoyu-git/workshop4/master/attendee/tekton/task-4.yaml
$ oc create -f https://raw.githubusercontent.com/liuxiaoyu-git/workshop4/master/attendee/tekton/git-resources.yaml
$ tkn task list
NAME     DESCRIPTION   AGE
task-1                 50 seconds ago
task-2                 50 seconds ago
task-3                 50 seconds ago
task-4                 50 seconds ago
$ tkn resource list
NAME                            TYPE   DETAILS
git-repo-simple-rest-resource   git    url: https://github.com/marrober/simpleRest.git
task-1.yaml
apiVersion: tekton.dev/v1beta1
kind: Task
metadata:
  name: task-1
spec:
  steps:
    - name: echo-statement-1
      image: quay.io/openshift/origin-cli:latest
      command: ["echo"]
      args: ["This is my first task in Tekton"]
    - name: echo-statement-2
      image: quay.io/openshift/origin-cli:latest
      command: ["echo"]
      args: [
        "------------------------------------------------------------\n",
        " - This is a multi-line comment\n",
        " - This is useful as a separator but each line has\n",
        " - the title repeated next to it using different colours\n",
        " - which helps with the identification of different tasks.\n",
        "------------------------------------------------------------\n",
      ]
task-2.yaml
apiVersion: tekton.dev/v1beta1
kind: Task
metadata:
  name: task-2
spec:
  steps:
    - name: what-directory
      image: quay.io/openshift/origin-cli:latest
      command: ["pwd"]
    - name: describe-command
      image: quay.io/openshift/origin-cli:latest
      command: ["echo"]
      args: [
        "------------------------------------------------------------\n",
        " - Openshift OC command line example \n",
        "------------------------------------------------------------\n",
      ]
    - name: oc-version
      image: quay.io/openshift/origin-cli:latest
      command: ["oc"]
      args: ["version"]
task-3.yaml
apiVersion: tekton.dev/v1beta1
kind: Task
metadata:
  name: task-3
spec:
  steps:
    - name: echo-statement-3
      image: quay.io/openshift/origin-cli:latest
      command: ["echo"]
      args: ["echo - statement 3"]
    - name: echo-statement-4
      image: quay.io/openshift/origin-cli:latest
      command: ["echo"]
      args: ["echo - statement 4"]
task-4.yaml
apiVersion: tekton.dev/v1beta1
kind: Task
metadata:
  name: task-4
spec:
  params:
    - name: parameter1
    - name: parameter2
      default: "Default value for parameter 2"
  resources:
    inputs:
      - name: git-repo-simple-rest
        type: git
  steps:
    - name: echo-statement-1
      image: quay.io/openshift/origin-cli:latest
      command: ["echo"]
      args: ["Parameter 1 : $(inputs.params.parameter1)"]
    - name: echo-statement-2
      image: quay.io/openshift/origin-cli:latest
      command: ["echo"]
      args: ["Parameter 2 : $(inputs.params.parameter2)"]
    - name: view-workspace-content
      image: quay.io/openshift/origin-cli:latest
      command: ["ls"]
      args: ["-laR"]
git-resources.yaml
apiVersion: tekton.dev/v1alpha1
kind: PipelineResource
metadata:
  name: git-repo-simple-rest-resource
spec:
  type: git
  params:
  - name: url
    value: https://github.com/marrober/simpleRest.git
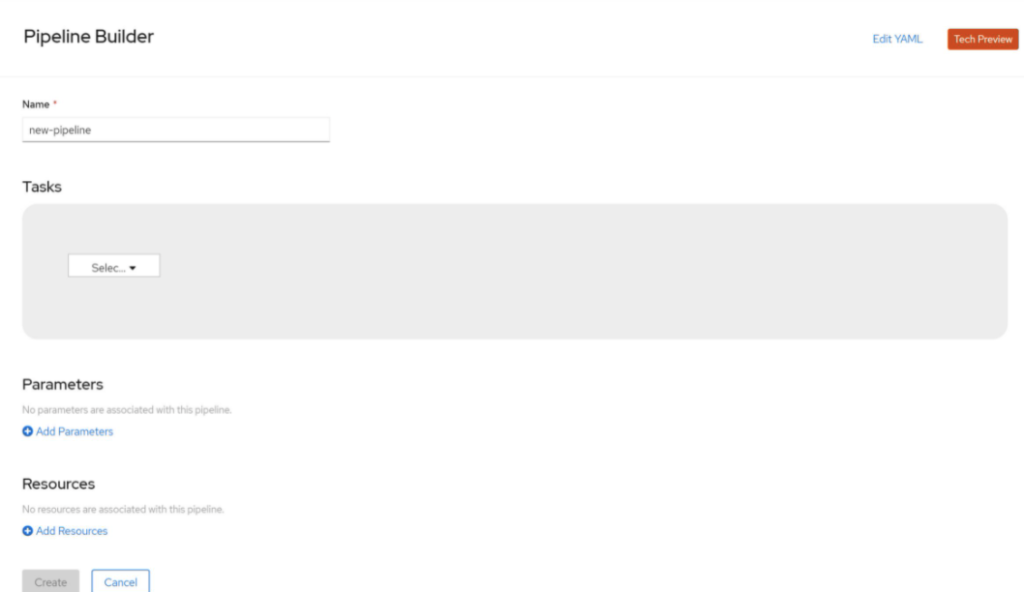
3.进入OpenShift控制台,在Administrator视图中进入Pipelines菜单的Pipelines项目,然后在Pipelines页面中点击“Create Pipeline”按钮。 此时显示如下Pipeline Builder界面:
4.将Pipeline命名为“my-pipeline”。然后选择上图中的“Select”下拉框,选中“task-1”。再选中下图中右侧“+”,从显示的“Select”下拉框中选择“task-2”。

5.安装以上操作,依次增加“task-3”和“task-4”。此时task-4提示错误,这是由于其中使用了Pipeline Resource。

6.在页面的Resource区域添加一个resource,名称和类型如下:

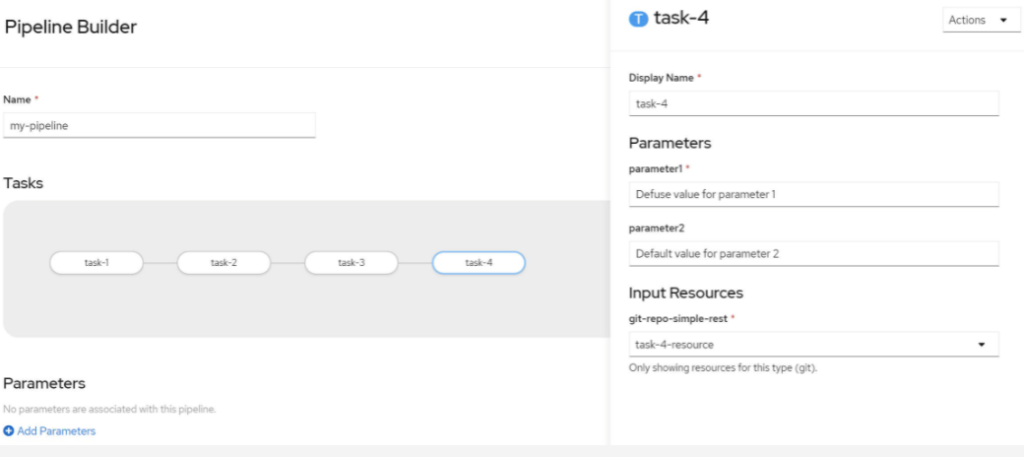
7.选中“task-4”,从右滑的界面中提供“parameter1”的参数值,然后在从Input Resources中从下拉框中选择task-4-resource。最后保存my-pipeline的配置。
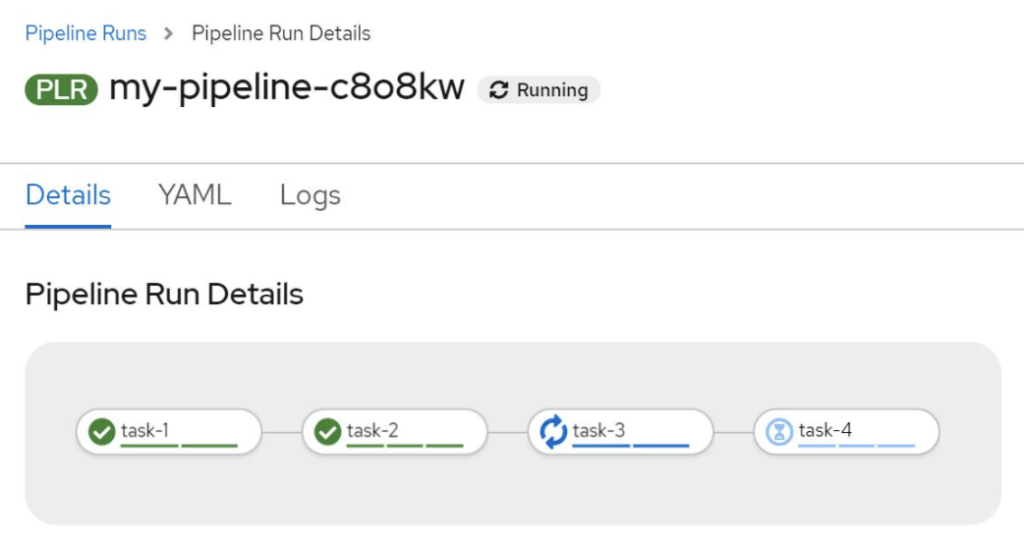
8.在my-pipeline的页面中,从Actions下拉框中选择Start运行这个Pipeline。
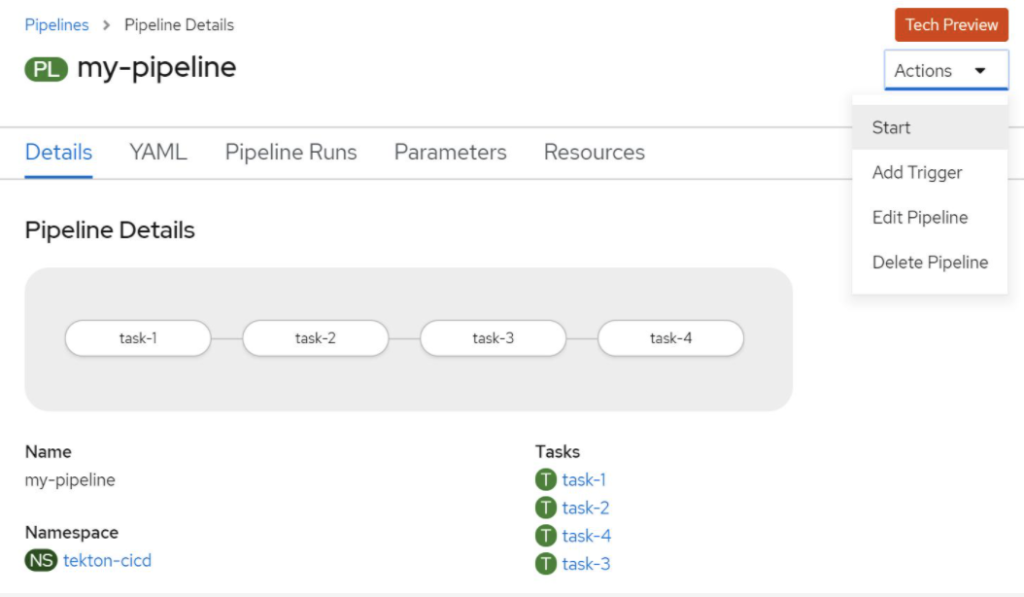
9.在“Start Pipeline”弹出框中点击Start按钮,此时my-pipeline开始运行。可以在页面中看到执行进度,另外还可在Logs中查看执行日志。
10.执行命令创建Task使用的PVC资源。
$ oc create -f https://raw.githubusercontent.com/liuxiaoyu-git/workshop4/master/attendee/tekton/git-resources.yaml
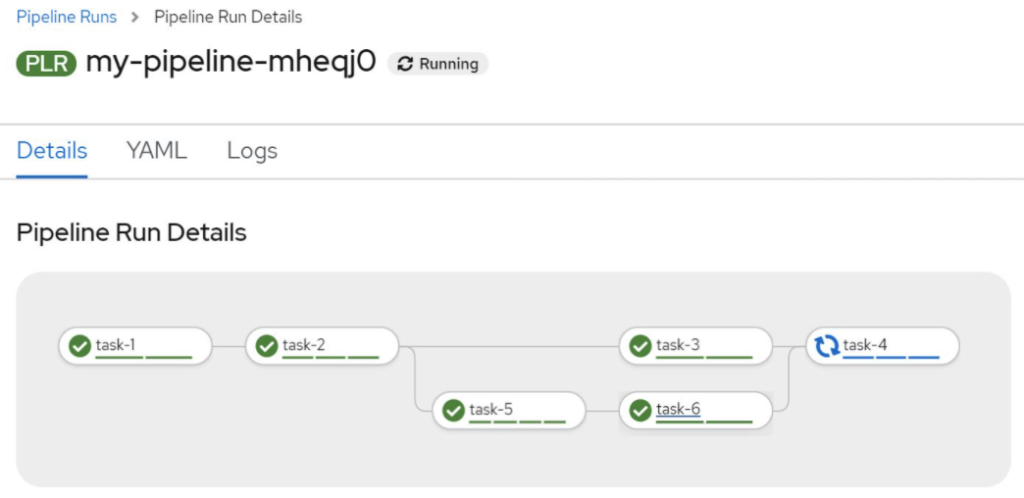
11.在my-pipeline的页面中,从Action下拉框中选择“Edit Pipeline”。 然后在“Pipeline Builder”页面中点击“task-3”下方的“+”,然后加入“task-5”;再点击“task-5”右方的“+”,加入“task-6”;最后Save保存配置。
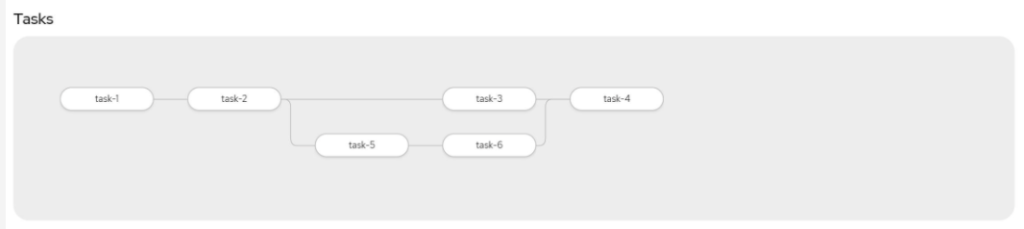
12.再次运行my-pipeline,确认”task-3″和“task-5”可以同时运行。
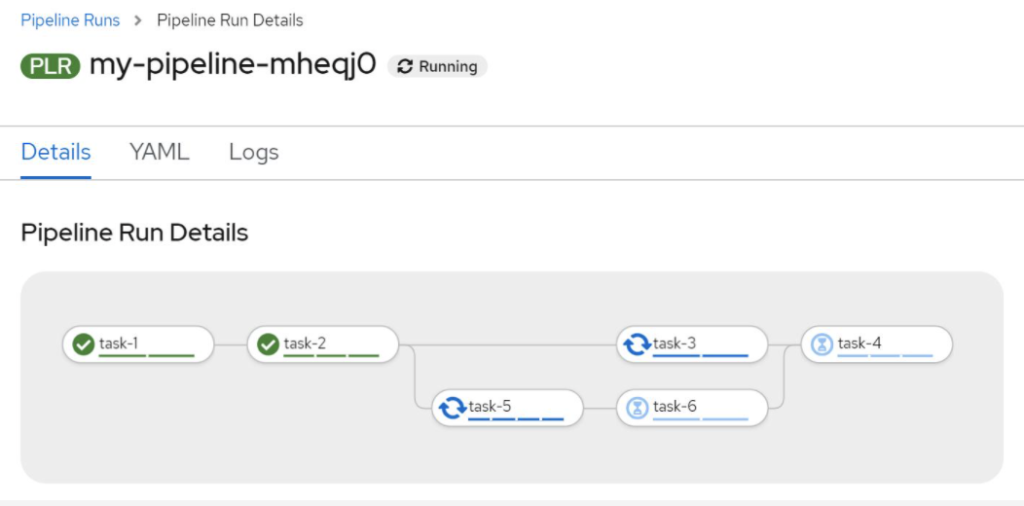
13.另外“task-4”只在”task-3″和“task-6”都完成运行后才能开始运行。