一,Core Data介绍
1,Core Data是iOS5之后才出现的一个数据持久化存储框架,它提供了对象-关系映射(ORM)的功能,即能够将对象转化成数据,也能够将保存在数据库中的数据还原成对象。
2,虽然其底层也是由类似于SQL的技术来实现,但我们不需要编写任何SQL语句,有点像Java开发中的Hibernate持久化框架
3,Core Data数据最终的存储类型可以是:SQLite数据库,XML,二进制,内存里,或自定义数据类型。
4,与SQLite区别:只能取出整个实体记录,然后分解,之后才能得到实体的某个属性。
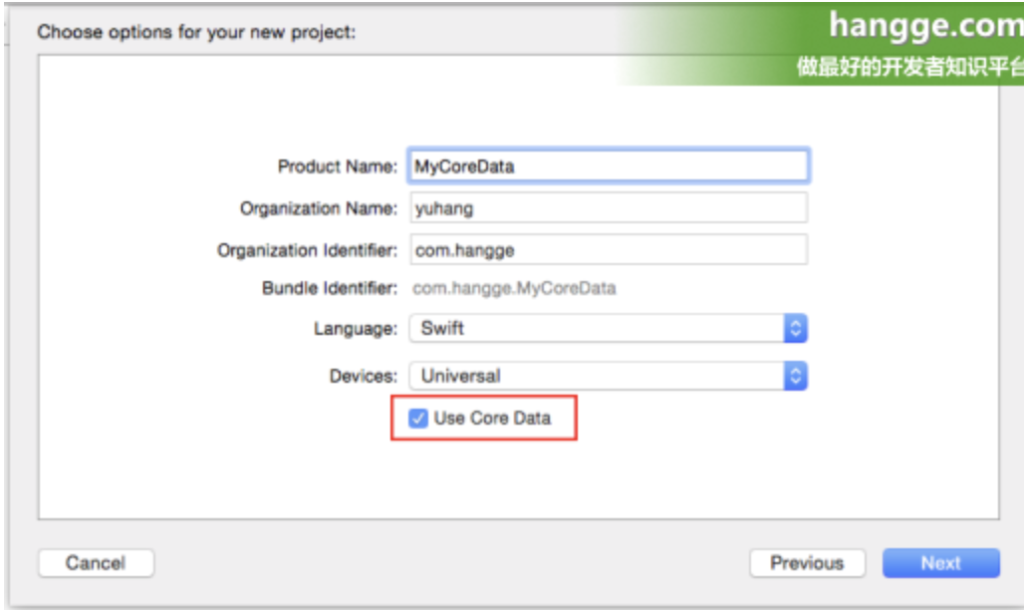
二,Core Data的使用准备 – 数据模型和实体类的创建1,创建项目的时候,勾选“Use Core Data”。完毕后在 AppDelegate 中,会生成相关代码。
1,创建项目的时候,勾选“Use Core Data”。完毕后在 AppDelegate 中,会生成相关代码。
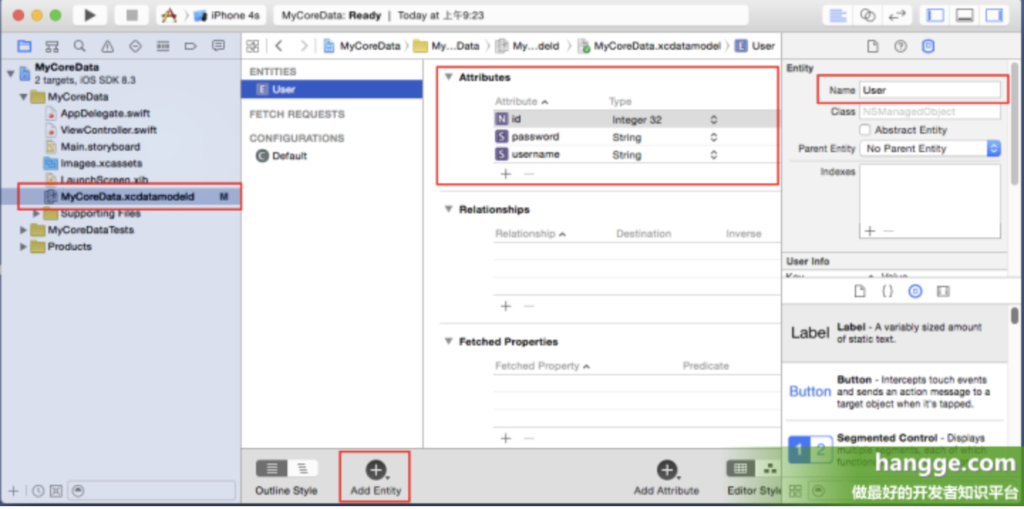
2,打开项目中的 xcdatamodeld 文件,在右边的数据模型编辑器的底部工具栏点击 Add Entity 添加实体。同时在属性栏中对实体命名进行修改,并在 Attribute 栏目中添加 id,username,password 三个属性。
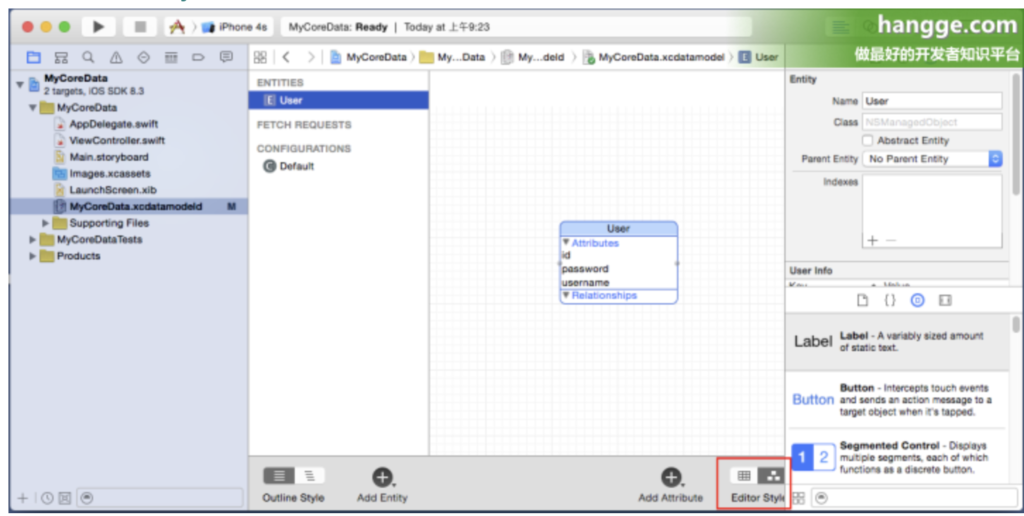
3,点击下方的 Editor Style 按钮可以查看实体的关系图。
4,自 iOS10 和 swift3 之后,访问 CoreData 的方法简洁了许多,我们不再需要手动新建对应于 entity 的 class。
三,Core Data的使用
1,首先在代码中引入CoreData库
import CoreData
2,插入(保存)数据操作
//获取管理的数据上下文 对象
let app = UIApplication.shared.delegate as! AppDelegate
let context = app.persistentContainer.viewContext

//创建User对象
let user = NSEntityDescription.insertNewObject(forEntityName: "User",
                                               into: context) as! User

//对象赋值
user.id = 1
user.username = "hangge"
user.password = "1234"

//保存
do {
    try context.save()
    print("保存成功!")
} catch {
    fatalError("不能保存:\(error)")
}
3,查询数据操作
//获取管理的数据上下文 对象
let app = UIApplication.shared.delegate as! AppDelegate
let context = app.persistentContainer.viewContext

//声明数据的请求
let fetchRequest = NSFetchRequest<User>(entityName:"User")
fetchRequest.fetchLimit = 10 //限定查询结果的数量
fetchRequest.fetchOffset = 0 //查询的偏移量

//设置查询条件
let predicate = NSPredicate(format: "id= '1' ", "")
fetchRequest.predicate = predicate

//查询操作
do {
    let fetchedObjects = try context.fetch(fetchRequest)

    //遍历查询的结果
    for info in fetchedObjects{
        print("id=\(info.id)")
        print("username=\(info.username)")
        print("password=\(info.password)")
    }
}
catch {
    fatalError("不能保存:\(error)")
}
4,修改数据操作
即将查询出来的对象进行重新赋值,然后再使用context.save方法重新保存即可
//遍历查询的结果
for info in fetchedObjects{
    //修改密码
    info.password = "abcd"
    //重新保存
    try context.save()
}
5,删除数据操作
删除操作使用context.delete方法,删除某个对象。然后使用context.save方法保存更新到数据库
//遍历查询的结果
for info in fetchedObjects{
    //删除对象
    context.delete(info)
}

//重新保存-更新到数据库
try! context.save()
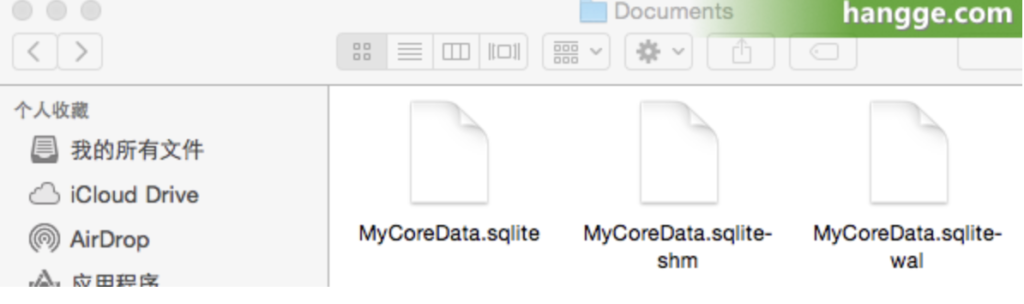
四,数据的存放位置
默认Core Data生成的是sqlite文件,保存在Documents文件夹下