前置知识
在搭建服务器之前,我们需要对直播这个概念本身有一个大概的理解。
我们经常听到两个词:推流(push/upstream) 和 拉流(pull/downstream)
推流大概指的是将从某设备上采集到的画面、音频上传到直播流媒体服务器上。
拉流大概指的是从直播流媒体服务器上下载那些推流上来的东西。

信息在网络中传播一定要遵循某种协议,否则就乱套了嘛,那么这些所谓的 流 在网络中传播,又有哪些可以遵循的协议呢?大概列举我认识的3个:
RTMP
RTMP 协议是 Adobe 公司设计的一个基于 TCP 传输的协议,被设计用来对基于底层传输协议的多媒体传输流(如音频、视频和交互数据)进行复用和分包。
RTMP 协议是目前最主流的传输协议,但是它最大的问题是,如果需要在浏览器上进行拉流,那么浏览器本身需要支持 flash,而当前众多浏览器厂商已经默认禁用了flash,对于用户体验十分不友好。
HTTP-FLV
flv(flash video) 本身是一种视频格式,也是 Adobe 公司推出的,在网络上传输的视频大多都是以这种格式封装的。而 http-flv 则是将推流推上来的流媒体数据封装成 flv ,并且通过 HTTP 协议进行传输的协议。需要浏览器端支持播放 flv 格式的视频才可以。
在本文中,推流使用的协议是 rtmp ,而拉流时使用的协议是 http-flv。
HLS
HLS(Http Live Streaming) 是苹果提出的基于 HTTP 的流媒体传输协议,他的大致原理是将一个大的视频数据文件切分成若干个小的视频文件,然后客户端拉流的时候依照顺序一个一个地将小视频文件拉下来。HLS最大的优点就是,HTML5可以直接打开播放。
nginx 嘛,众所周知它在 Windows 底下有各种奇奇怪怪的问题,所以我们这一次选择在
linux底下进行部署这么一套服务器。
nginx 嘛,众所周知它在 Windows 底下有各种奇奇怪怪的问题,所以我们这一次选择在
linux底下进行部署这么一套服务器。
其实我在部署这个服务器的时候,使用的是 docker ,但是本文在记录的时候不打算基于 docker 环境进行解释,因为个人对 docker 还有很多不熟悉的地方。
一、下载源代码
为了让 nginx 拥有处理流媒体的能力,我们需要通过 编译安装 的方式来安装 nginx。
由于在本篇中我们尝试讲清楚的是搭建一个基于 http-flv 的流媒体服务器,所以在编译时,我们需要为 nginx 添加 nginx-http-flv-module 模块。
我们把 nginx 和 nginx-http-flv-module 的源代码都下载到 /tmp 目录下
nginx版本号目前是1.15.9,nginx-http-flv-module的版本号目前是1.2.6,在下方的命令行中可能有所体现。
cd /tmp
git clone nginx-http-flv-module
wget https://nginx.org/download/nginx-1.15.9.tar.gz
解压刚刚下载的 nginx,并进入到 nginx 的目录
tar -xzf nginx-1.15.9.tar.gz
cd nginx-1.15.9
二、编译安装
./configure --add-module=/tmp/nginx-http-flv-module --with-http_ssl_module
make
make install
这么一个过程下来后,nginx 会被安装在 /usr/local/nginx 底下。
需要注意的是,nginx-http-flv-module 是基于 nginx-rtmp-module 开发的,完全兼容 nginx-rtmp-module 的所有功能,所以在编译时无需重复添加 nginx-rtmp-module 模块。
上述命令中还包含了 --with-http_ssl_module 参数,是根据 nginx-rtmp-module 的编译安装说明进行的。
三、编辑 nginx.conf
使用 vi 或其他编辑工具编辑 /usr/local/nginx/conf/nginx.conf ,内容如下:
worker_processes  1;

events {
    worker_connections  1024;
}

rtmp {
    server {
        listen 9999;  # 接受推流的端口号
        chunk_size 8192; # 单一推流数据包的最大容量?

        application myapp { # myapp 模块,可以自行更换名字
            live on; # 打开直播
            # 非常重要, 设定让ngnix断开阻塞中的连接, 才能触发exec_record_done
            # 以及客户端的LFLiveKit reconnectCount自动重新连接才会好用
            drop_idle_publisher 5s;
            meta off; # 为了兼容网页前端的 flv.js,设置为 off 可以避免报错
            gop_cache on; # 支持GOP缓存,以减少首屏时间
            allow play all; # 允许来自任何 ip 的人拉流
        }
    }
}

http {
    include       mime.types;
    default_type  application/octet-stream;

    sendfile        on;
    keepalive_timeout  65;

    server {
        listen       8080;  # http 服务的端口
        server_name  localhost;

        location /live { # 拉流时的 uri ,可以自行修改
            flv_live on; # 打开 http-flv 服务
            chunked_transfer_encoding on;
            add_header 'Access-Control-Allow-Origin' '*'; # 允许跨域
            add_header 'Access-Control-Allow-Credentials' 'true';
        }

    }

}
四、启动 Nginx
启动位于 /usr/local/nginx/sbin 的 nginx
./nginx
当使用如上配置开启 Nginx 时,推流和拉流的地址分别是这样:
- 推流地址:
rtmp://localhost:9999/myapp/mystream - 拉流地址:
http://localhost:8080/live?port=9999&app=myapp&stream=mystream
其中的 myapp 指的是配置文件(nginx.conf)中 rtmp 块指定的 application,一个 rtmp server可以拥有多个 application,只要名字对应的上,叫啥都可以。
示例地址中的 mystream 可以由用户自己指定,只要拉流地址的参数stream对应的上就行了,有点类似于房间的概念,推流要推到哪个application底下的哪个房间的感觉。
五、使用 OBS 推流
我这里使用的是 OBS 软件进行推流,打开 OBS 设置面板 > 流
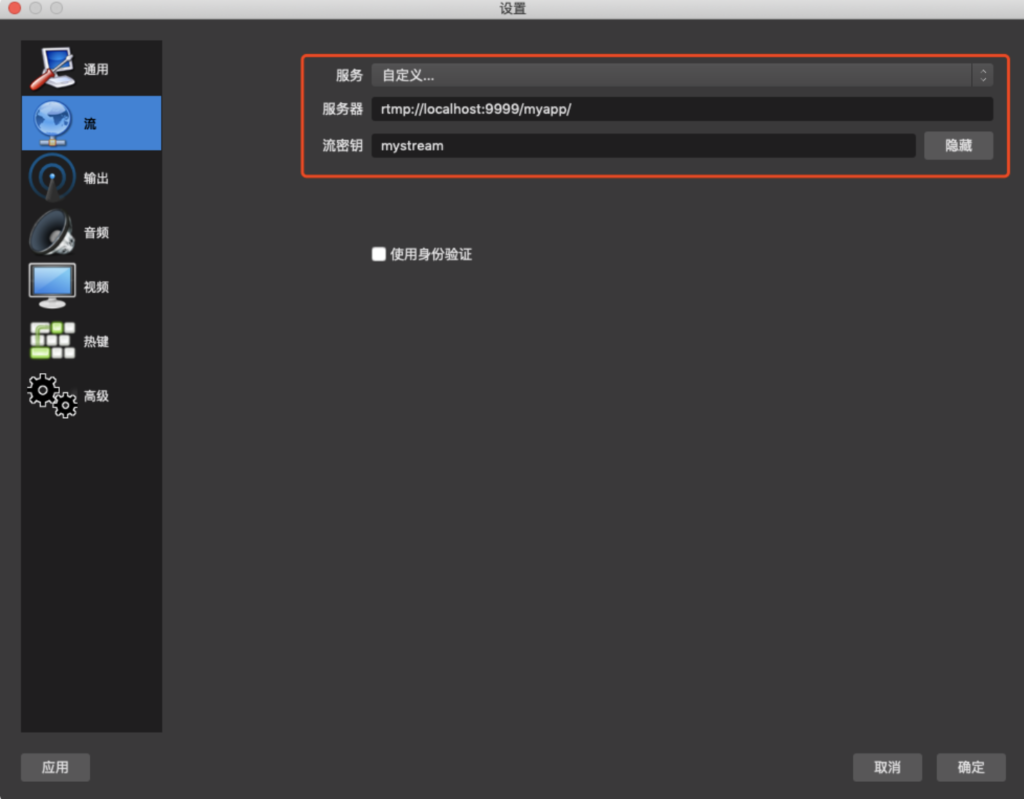
- 将服务设置为:
自定义 - 服务器设置为不包含房间名的推流地址示例:
rtmp://localhost:9999/myapp/ - 流秘钥设置为房间名:
mystream
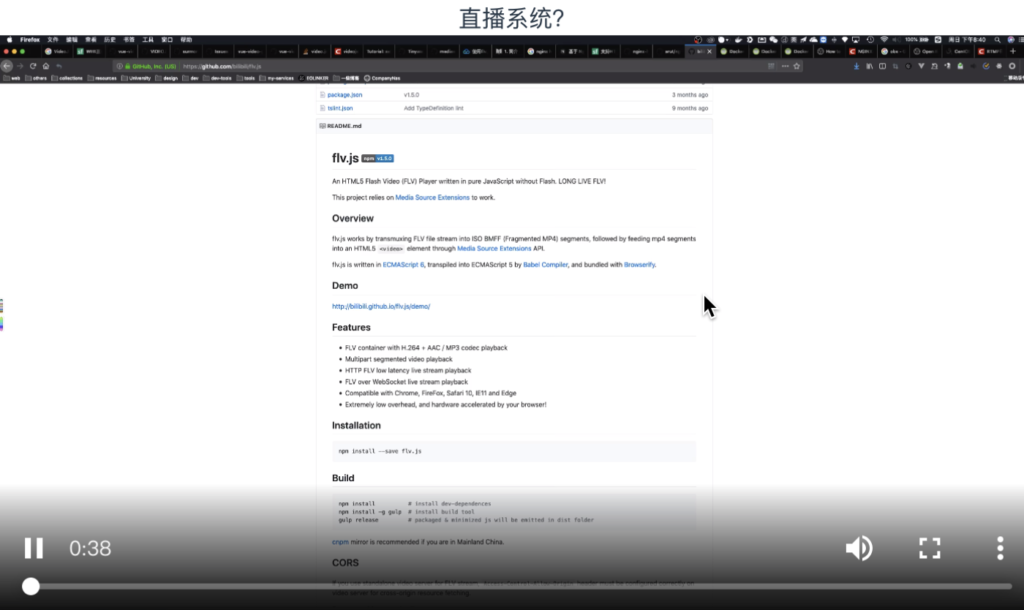
六、使用 flv.js 拉流
通过 flv.js 可以直接在网页上播放我们刚刚进行推流的音视频。
这里提供最基础的代码片段:
<script src="flv.min.js"></script>
<video id="videoElement"></video>
<script>
    if (flvjs.isSupported()) {
        var videoElement = document.getElementById('videoElement');
        var flvPlayer = flvjs.createPlayer({
            type: 'flv',
            isLive:true, // 如果是直播流需要设置这个值为 true
            url: 'http://localhost:8080/live?port=9999&app=myapp&stream=mystream'
        // ↑ 拉流示例地址,stream参数一定要和推流时所设置的流密钥一致
        });
        flvPlayer.attachMediaElement(videoElement);
        flvPlayer.load();
        flvPlayer.play();
    }
</script>
运行效果如下:
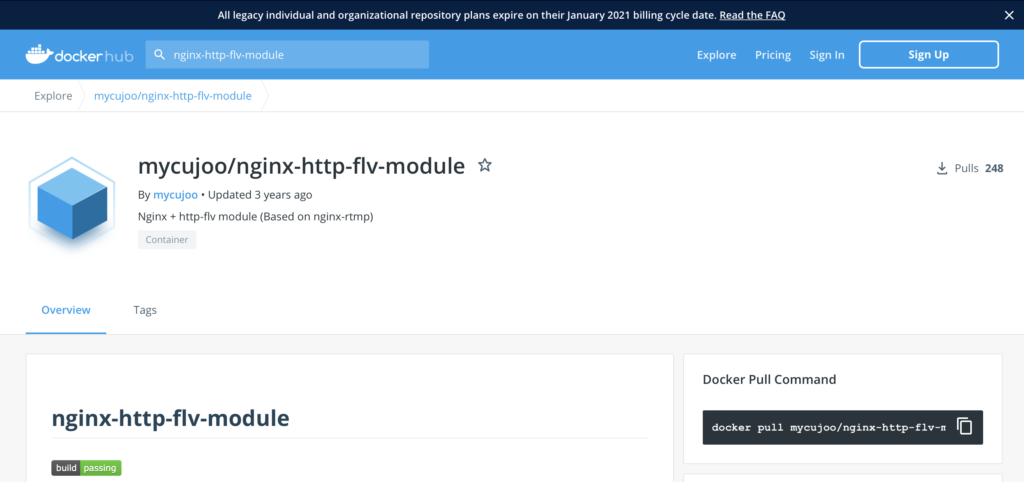
附:Docker 配置 nginx-http-flv服务器
我们可以,通过docker直接使用nginx-http-flv-module镜像,这样能省去很多配置的时间。nginx-http-flv-module 是基于 nginx-rtmp-module 开发的,完全兼容 nginx-rtmp-module 的所有功能。
docker镜像地址:https://hub.docker.com/r/mycujoo/nginx-http-flv-module
我们可以用下面命令来下载镜像启动。
// 下载镜像
docker pull mycujoo/nginx-http-flv-module
// 查看镜像
docker images
// 运行容器
docker run -d -p 1965:1965 -p 8181 --name http-flv mycujoo/nginx-http-flv-module:latest
// 用这个命令可以进入到docker内部
docker exec -it http-flv sh
但是我们可能需要自己配置ngnix,需要修改ngnix config文件。这样的话,我们需要知道docker 镜像中,ngnix.config中的位置,我们可以通过下面的命令找位置。
// 首先用这个命令进入docker容器
docker exec -it http-flv sh

// 用这个命令找到nginx.conf文件在镜像中的位置,可以找到在 /opt/nginx/nginx.conf
find / -name nginx.conf
Dockerfile(用我们自己的nginx.conf文件覆盖掉 docker镜像中/opt/nginx/nginx.conf)
FROM mycujoo/nginx-http-flv-module
COPY nginx.conf /opt/nginx/nginx.conf
自己的ngnix.comfig
daemon off;
error_log /var/log/nginx/error.log warn;
events {
worker_connections 1024;
}
rtmp {
out_queue   4096;
out_cork    8;
max_streams 64;


server {
    listen 1935;

    application live {
        live on;
        record all;
        record_path /tmp;
        record_max_size 10485760K;
        record_unique off;
        record_append on;
        gop_cache on; #open GOP cache for reducing the wating time for the first picture of video
    }
    # 非常重要, 设定让ngnix断开阻塞中的连接, 才能触发exec_record_done
    # 以及客户端的LFLiveKit reconnectCount自动重新连接才会好用
    drop_idle_publisher 30s;
    ping 20s;
    ping_timeout 10s;
    meta on;
    chunk_size 4096;
    wait_video on;
    wait_key on;

    application hls {
        live on;
        record all;
        record_append on;
        record_max_size 10485760K;
        record_path /opt/data/hls;
        hls on;
        hls_fragment_naming system;
        hls_fragment 5s;
        hls_path /opt/data/hls;
        hls_nested on;
    }
}
}
http {
include mime.types;
default_type application/octet-stream;
keepalive_timeout 65;
log_format main ‘$remote_addr – $remote_user [$time_local] “$request” ‘
‘$status $body_bytes_sent “$http_referer” ‘
‘”$http_user_agent” “$http_x_forwarded_for”‘;
access_log /var/log/nginx/access.log;

server {
    listen 8080;

    location /live {
        flv_live on; #open flv live streaming (subscribe)
        chunked_transfer_encoding  off; #open 'Transfer-Encoding: chunked' response

        add_header 'Access-Control-Allow-Origin' '*'; #add additional HTTP header
        add_header 'Access-Control-Allow-Credentials' 'true'; #add additional HTTP header
    }

     location ~ ^/play/(.*)\.flv {
        proxy_redirect off;
        proxy_pass http://127.0.0.1/live?app=live&stream=$1;
    }

    location /hls {
        types {
            application/vnd.apple.mpedaemon off;

error_log /var/log/nginx/error.log warn;

events {
    worker_connections 1024;
}

rtmp {

    out_queue   4096;
    out_cork    8;
    max_streams 64;


    server {
        listen 1935;

        application rtmplive {
            live on;
            record all;
            record_path /tmp;
            record_max_size 10485760K;
            record_unique off;
            record_append on;
            gop_cache on; #open GOP cache for reducing the wating time for the first picture of video
            allow play all;
            meta off;
        }

        application hls {
            live on;
            hls on;
            record all;
            record_append on;
            record_max_size 10485760K;
            record_path /opt/data/hls;
            hls_fragment_naming system;
            hls_fragment 5s;
            hls_path /opt/data/hls;
        }
    }
}

http {
    include mime.types;
    default_type application/octet-stream;
    sendfile on;
    keepalive_timeout 65;

    access_log /var/log/nginx/access.log;

    server {
        listen 8080;

        location /live {
            flv_live on; #open flv live streaming (subscribe)
            chunked_transfer_encoding  off; #open 'Transfer-Encoding: chunked' response

            add_header 'Access-Control-Allow-Origin' '*'; #add additional HTTP header
            add_header 'Access-Control-Allow-Credentials' 'true'; #add additional HTTP header
        }

        location /hls {
            types {
                application/vnd.apple.mpegurl m3u8;
                video/mp2t ts;
            }
            root /opt/data;
            add_header Cache-Control no-cache;
            add_header Access-Control-Allow-Origin *;
        }
    }
}gurl m3u8;
            video/mp2t ts;
        }
        root /opt/data;
        add_header Cache-Control no-cache;
        add_header Access-Control-Allow-Origin *;
    }

    location /stat {
       rtmp_stat all;
       rtmp_stat_format json;
    }

    location /static {
        alias /www/static;
    }

    location = /crossdomain.xml {
        root /www/static;
        default_type text/xml;
        expires 24h;
    }
}
}
用下面命令build镜像,并启动
docker build -t nginx-rtmp .
docker run -d -p 1935:1935 -p 8080:8080 -v /tmp/video:/tmp -v /tmp/hls:/opt/data/hls --privileged=true --name nginx-rtmp nginx-rtmp
HLS 推流url:rtmp://123.57.164.21:1935/hls/cs
HLS 拉流url:http://123.57.164.21:8080/hls/cs.m3u8
rtmp推流url:rtmp://123.57.164.21:1935/rtmplive/cs
flv拉流url:http://123.57.164.21:8080/live?port=1935&app=rtmplive&stream=cs