在前面一篇文章:Swift – 视频录制系列教程1(调用摄像头拍摄录像,并保存到系统相册)。我介绍了如何通过 AVFoundation.framework 框架提供的 AVCaptureSession 类来实现视频的录制。当时的程序是点击“开始”按钮就开始视频录制,点击“停止”则将视频保存起来。整个视频是连续地录制,没有时间限制。今天继续在其基础之上做个改进,实现小视频拍摄功能。
1,小视频拍摄要实现的功能
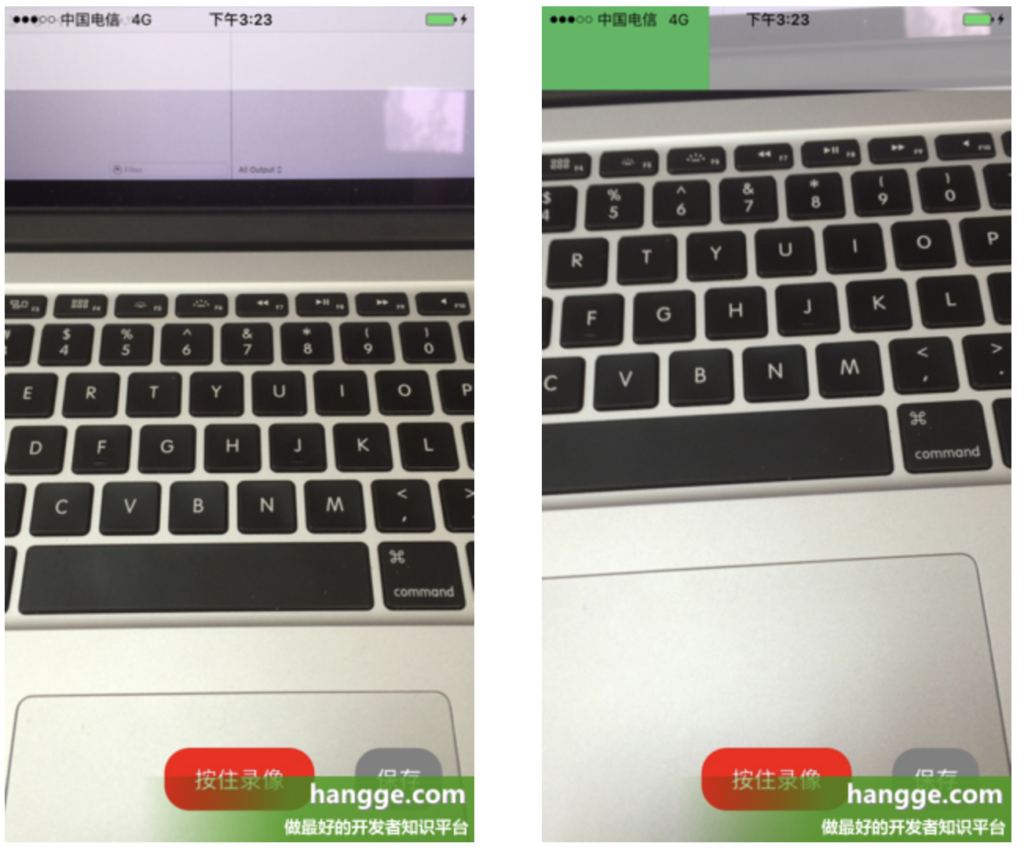
- (1)视频可以分段录制。按住“录像”按钮,则开始捕获摄像头进行视频录制,放开按钮则暂停录制。
- (2)所有视频片段加起来的时间长度会有限制(本样例限制为15秒)。录制的时候顶部会有实时的进度条。
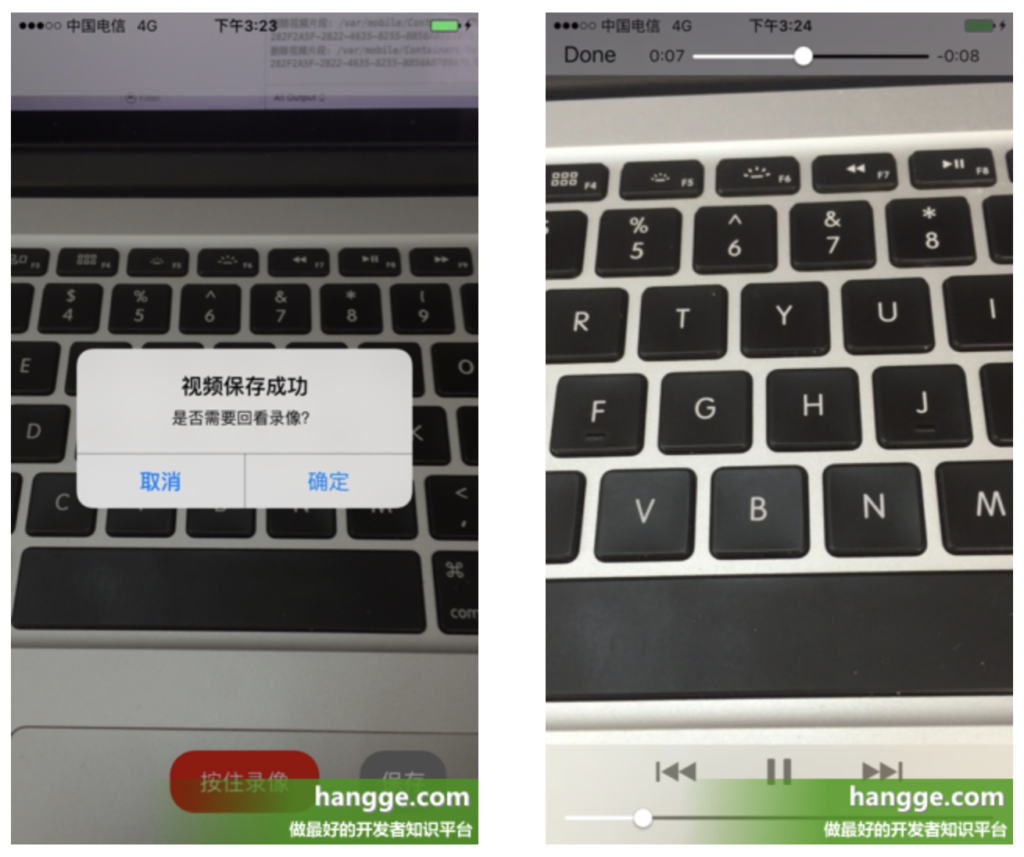
- (3)点击“保存”按钮,或者总时长到达15秒时,则停止继续录像。程序会将各个视频片段进行合并,并保存到系统相册中。
- (4)保存成功后,可以回看生成的录像。
2,效果图如下
3,实现原理‘
- (1)每次按下按钮录制的视频片段,同样是使用 AVCaptureMovieFileOutput 输出到 Documents 文件夹下,命名为 output-1.mov、output-2.mov….
- (2)通过 AVMutableComposition 来拼接合成各个视频片段的视频、音频轨道。
- (3)使用 AVAssetExportSession 将合并后的视频压缩输出成一个最终的视频文件:mergeVideo-****.mov(本文使用高质量压缩),并保存到系统相册中去。
- (4)通过 AVPlayerViewController 进行录像的回看。
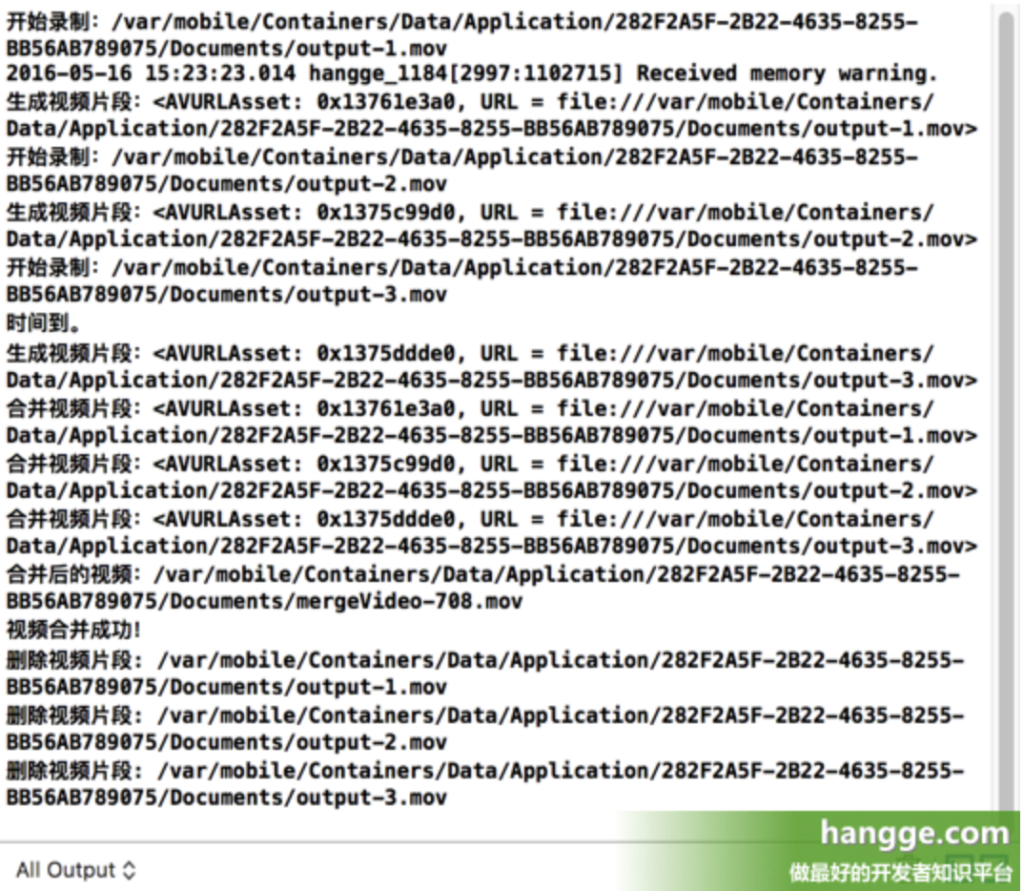
4,录制一段由三个片段合成的视频,控制台信息如下:
5,Info.plist 配置
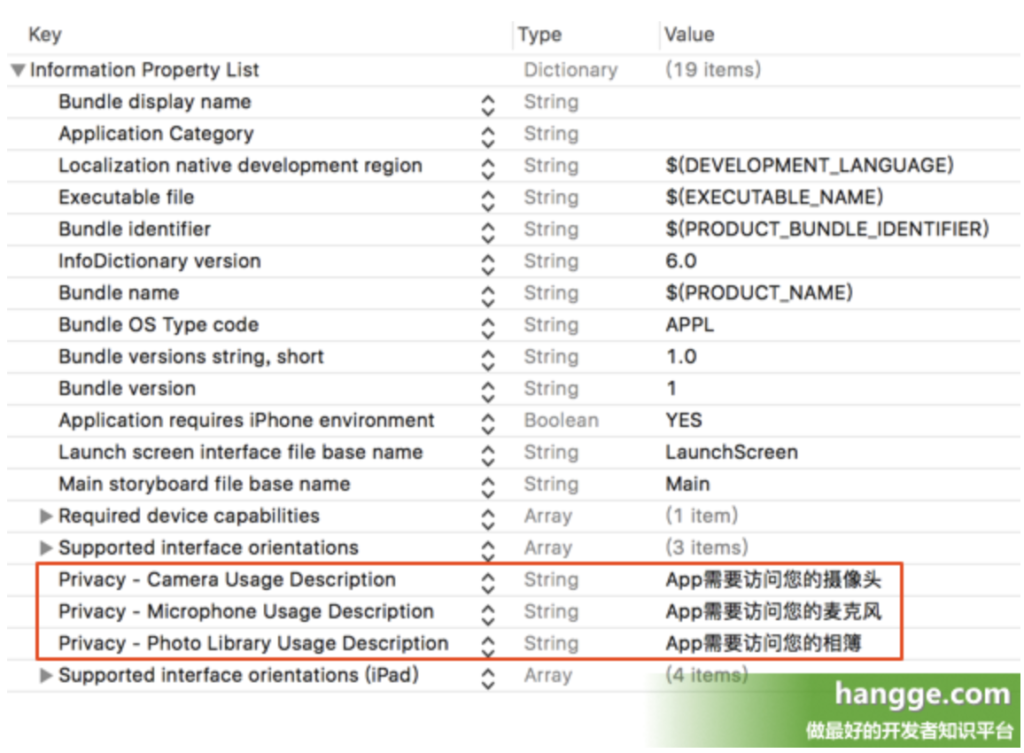
由于苹果安全策略更新,在使用 Xcode8 开发时,需要在 Info.plist 配置请求摄像头、麦克风、相册权限的描述字段:
- Privacy – Camera Usage Description
- Privacy – Microphone Usage Description
- Privacy – Photo Library Usage Description
6,样例代码
import UIKit
import AVFoundation
import Photos
import AVKit

class ViewController: UIViewController , AVCaptureFileOutputRecordingDelegate {

    //视频捕获会话。它是input和output的桥梁。它协调着intput到output的数据传输
    let captureSession = AVCaptureSession()
    //视频输入设备
    let videoDevice = AVCaptureDevice.default(for: AVMediaType.video)
    //音频输入设备
    let audioDevice = AVCaptureDevice.default(for: AVMediaType.audio)
    //将捕获到的视频输出到文件
    let fileOutput = AVCaptureMovieFileOutput()

    //录制、保存按钮
    var recordButton, saveButton : UIButton!

    //保存所有的录像片段数组
    var videoAssets = [AVAsset]()
    //保存所有的录像片段url数组
    var assetURLs = [String]()
    //单独录像片段的index索引
    var appendix: Int32 = 1

    //最大允许的录制时间(秒)
    let totalSeconds: Float64 = 15.00
    //每秒帧数
    var framesPerSecond:Int32 = 30
    //剩余时间
    var remainingTime : TimeInterval = 15.0

    //表示是否停止录像
    var stopRecording: Bool = false
    //剩余时间计时器
    var timer: Timer?
    //进度条计时器
    var progressBarTimer: Timer?
    //进度条计时器时间间隔
    var incInterval: TimeInterval = 0.05
    //进度条
    var progressBar: UIView = UIView()
    //当前进度条终点位置
    var oldX: CGFloat = 0

    override func viewDidLoad() {
        super.viewDidLoad()

        //添加视频、音频输入设备
        let videoInput = try! AVCaptureDeviceInput(device: self.videoDevice!)
        self.captureSession.addInput(videoInput)
        let audioInput = try! AVCaptureDeviceInput(device: self.audioDevice!)
        self.captureSession.addInput(audioInput)

        //添加视频捕获输出
        let maxDuration = CMTimeMakeWithSeconds(totalSeconds,
                                            preferredTimescale: framesPerSecond)
        self.fileOutput.maxRecordedDuration = maxDuration
        // 重要 设定输出的视频MP4文件横屏
        // self.fileOutput.connection(with:AVMediaType.video)!.videoOrientation = .landscapeLeft
        self.captureSession.addOutput(self.fileOutput)

        //使用AVCaptureVideoPreviewLayer可以将摄像头的拍摄的实时画面显示在ViewController上
        let videoLayer = AVCaptureVideoPreviewLayer(session: self.captureSession)
        videoLayer.frame = self.view.bounds
        videoLayer.videoGravity = AVLayerVideoGravity.resizeAspectFill
        // 重要 设定手机横屏显示
        // videoLayer.connection!.videoOrientation = AVCaptureVideoOrientation.landscapeLeft
        self.view.layer.addSublayer(videoLayer)

        //创建按钮
        self.setupButton()
        //启动session会话
        self.captureSession.startRunning()

        //添加进度条
        progressBar.frame = CGRect(x: 0, y: 0, width: self.view.bounds.width,
                                   height: self.view.bounds.height * 0.1)
        progressBar.backgroundColor = UIColor(red: 4, green: 3, blue: 3, alpha: 0.5)
        self.view.addSubview(progressBar)
    }

    //创建按钮
    func setupButton(){
        //创建录制按钮
        self.recordButton = UIButton(frame: CGRect(x:0,y:0,width:120,height:50))
        self.recordButton.backgroundColor = UIColor.red
        self.recordButton.layer.masksToBounds = true
        self.recordButton.setTitle("按住录像", for: .normal)
        self.recordButton.layer.cornerRadius = 20.0
        self.recordButton.layer.position = CGPoint(x: self.view.bounds.width/2,
                                                   y:self.view.bounds.height-50)
        self.recordButton.addTarget(self, action: #selector(onTouchDownRecordButton(_:)),
                                    for: .touchDown)
        self.recordButton.addTarget(self, action: #selector(onTouchUpRecordButton(_:)),
                                    for: .touchUpInside)

        //创建保存按钮
        self.saveButton = UIButton(frame: CGRect(x:0,y:0,width:70,height:50))
        self.saveButton.backgroundColor = UIColor.gray
        self.saveButton.layer.masksToBounds = true
        self.saveButton.setTitle("保存", for: .normal)
        self.saveButton.layer.cornerRadius = 20.0

        self.saveButton.layer.position = CGPoint(x: self.view.bounds.width - 60,
                                                 y:self.view.bounds.height-50)
        self.saveButton.addTarget(self, action: #selector(onClickStopButton(_:)),
                                  for: .touchUpInside)

        //添加按钮到视图上
        self.view.addSubview(self.recordButton);
        self.view.addSubview(self.saveButton);
    }

    //按下录制按钮,开始录制片段
    @objc func  onTouchDownRecordButton(_ sender: UIButton){
        if(!stopRecording) {
            let paths = NSSearchPathForDirectoriesInDomains(.documentDirectory,
                                                            .userDomainMask, true)
            let documentsDirectory = paths[0] as String
            let outputFilePath = "\(documentsDirectory)/output-\(appendix).mov"
            appendix += 1
            let outputURL = URL(fileURLWithPath: outputFilePath)
            let fileManager = FileManager.default
            if(fileManager.fileExists(atPath: outputFilePath)) {

                do {
                    try fileManager.removeItem(atPath: outputFilePath)
                } catch _ {
                }
            }
            print("开始录制:\(outputFilePath) ")
            fileOutput.startRecording(to: outputURL, recordingDelegate: self)
        }
    }

    //松开录制按钮,停止录制片段
    @objc func  onTouchUpRecordButton(_ sender: UIButton){
        if(!stopRecording) {
            timer?.invalidate()
            progressBarTimer?.invalidate()
            fileOutput.stopRecording()
        }
    }

    //录像开始的代理方法
    func fileOutput(_ output: AVCaptureFileOutput,
                    didStartRecordingTo fileURL: URL,
                    from connections: [AVCaptureConnection]) {
        startProgressBarTimer()
        startTimer()
    }

    //录像结束的代理方法
    func fileOutput(_ output: AVCaptureFileOutput,
                    didFinishRecordingTo outputFileURL: URL,
                    from connections: [AVCaptureConnection], error: Error?) {
        let asset = AVURLAsset(url: outputFileURL, options: nil)
        var duration : TimeInterval = 0.0
        duration = CMTimeGetSeconds(asset.duration)
        print("生成视频片段:\(asset)")
        videoAssets.append(asset)
        assetURLs.append(outputFileURL.path)
        remainingTime = remainingTime - duration

        //到达允许最大录制时间,自动合并视频
        if remainingTime <= 0 {
            mergeVideos()
        }
    }

    //剩余时间计时器
    func startTimer() {
        timer = Timer(timeInterval: remainingTime, target: self,
                      selector: #selector(ViewController.timeout), userInfo: nil,
                      repeats:true)
        RunLoop.current.add(timer!, forMode: .default)
    }

    //录制时间达到最大时间
    @objc func timeout() {
        stopRecording = true
        print("时间到。")
        fileOutput.stopRecording()
        timer?.invalidate()
        progressBarTimer?.invalidate()
    }

    //进度条计时器
    func startProgressBarTimer() {
        progressBarTimer = Timer(timeInterval: incInterval, target: self,
                                 selector: #selector(ViewController.progress),
                                 userInfo: nil, repeats: true)
        RunLoop.current.add(progressBarTimer!, forMode: .default)
    }

    //修改进度条进度
    @objc func progress() {
        let progressProportion: CGFloat = CGFloat(incInterval / totalSeconds)
        let progressInc: UIView = UIView()
        progressInc.backgroundColor = UIColor(red: 55/255, green: 186/255, blue: 89/255,
                                              alpha: 1)
        let newWidth = progressBar.frame.width * progressProportion
        progressInc.frame = CGRect(x: oldX , y: 0, width: newWidth,
                                   height: progressBar.frame.height)
        oldX = oldX + newWidth
        progressBar.addSubview(progressInc)
    }

    //保存按钮点击
    @objc func onClickStopButton(_ sender: UIButton){
        mergeVideos()
    }

    //合并视频片段
    func mergeVideos() {
        let duration = totalSeconds

        let composition = AVMutableComposition()
        //合并视频、音频轨道
        let firstTrack = composition.addMutableTrack(
            withMediaType: AVMediaType.video, preferredTrackID: CMPersistentTrackID())
        let audioTrack = composition.addMutableTrack(
            withMediaType: AVMediaType.audio, preferredTrackID: CMPersistentTrackID())

        var insertTime: CMTime = CMTime.zero
        for asset in videoAssets {
            print("合并视频片段:\(asset)")
            do {
                try firstTrack?.insertTimeRange(
                    CMTimeRangeMake(start: CMTime.zero, duration: asset.duration),
                    of: asset.tracks(withMediaType: AVMediaType.video)[0] ,
                    at: insertTime)
            } catch _ {
            }
            do {
                try audioTrack?.insertTimeRange(
                    CMTimeRangeMake(start: CMTime.zero, duration: asset.duration),
                    of: asset.tracks(withMediaType: AVMediaType.audio)[0] ,
                    at: insertTime)
            } catch _ {
            }

            insertTime = CMTimeAdd(insertTime, asset.duration)
        }
        //旋转视频图像,防止90度颠倒
        firstTrack?.preferredTransform = CGAffineTransform(rotationAngle: CGFloat.pi/2)

        //获取合并后的视频路径
        let documentsPath = NSSearchPathForDirectoriesInDomains(.documentDirectory,
                                                                .userDomainMask,true)[0]
        let destinationPath = documentsPath + "/mergeVideo-\(arc4random()%1000).mov"
        print("合并后的视频:\(destinationPath)")
        let videoPath = URL(fileURLWithPath: destinationPath as String)
        let exporter = AVAssetExportSession(asset: composition,
                                            presetName:AVAssetExportPresetHighestQuality)!
       // let exporter = AVAssetExportSession(asset: composition,
                                            presetName: AVAssetExportPreset3840x2160)!
        exporter.outputURL = videoPath
        exporter.outputFileType = AVFileType.mov
        exporter.shouldOptimizeForNetworkUse = true
        exporter.timeRange = CMTimeRangeMake(
            start: CMTime.zero,
            duration: CMTimeMakeWithSeconds(Float64(duration),
                                            preferredTimescale: framesPerSecond))
        exporter.exportAsynchronously(completionHandler: {
            //将合并后的视频保存到相册
            self.exportDidFinish(session: exporter)
        })
    }

    //将合并后的视频保存到相册
    func exportDidFinish(session: AVAssetExportSession) {
        print("视频合并成功!")
        let outputURL = session.outputURL!
        //将录制好的录像保存到照片库中
        PHPhotoLibrary.shared().performChanges({
            PHAssetChangeRequest.creationRequestForAssetFromVideo(atFileURL: outputURL)
        }, completionHandler: { (isSuccess: Bool, error: Error?) in
            DispatchQueue.main.async {
                //重置参数
                self.reset()

                //弹出提示框
                let alertController = UIAlertController(title: "视频保存成功",
                                                        message: "是否需要回看录像?",
                                                        preferredStyle: .alert)
                let okAction = UIAlertAction(title: "确定", style: .default, handler: {
                    action in
                    //录像回看
                    self.reviewRecord(outputURL: outputURL)
                })
                let cancelAction = UIAlertAction(title: "取消", style: .cancel,
                                                 handler: nil)
                alertController.addAction(okAction)
                alertController.addAction(cancelAction)
                self.present(alertController, animated: true,
                             completion: nil)
            }
        })
    }

    //视频保存成功,重置各个参数,准备新视频录制
    func reset() {
        //删除视频片段
        for assetURL in assetURLs {
            if(FileManager.default.fileExists(atPath: assetURL)) {
                do {
                    try FileManager.default.removeItem(atPath: assetURL)
                } catch _ {
                }
                print("删除视频片段: \(assetURL)")
            }
        }

        //进度条还原
        let subviews = progressBar.subviews
        for subview in subviews {
            subview.removeFromSuperview()
        }

        //各个参数还原
        videoAssets.removeAll(keepingCapacity: false)
        assetURLs.removeAll(keepingCapacity: false)
        appendix = 1
        oldX = 0
        stopRecording = false
        remainingTime = totalSeconds
    }

    //录像回看
    func reviewRecord(outputURL: URL) {
        //定义一个视频播放器,通过本地文件路径初始化
        let player = AVPlayer(url: outputURL)
        let playerViewController = AVPlayerViewController()
        playerViewController.player = player
        self.present(playerViewController, animated: true) {
            playerViewController.player!.play()
        }
    }
}
附:合并成 mp4 格式的视频
上面样例中,我们是先录制好 mov 格式的视频片段,然后将它们合并成一个完整的 mov 视频。如果想最终生成一个 mp4 文件,只需在合并时修改下输出格式和文件名即可(见下方高亮处):
//合并视频片段
func mergeVideos() {
    let duration = totalSeconds

    let composition = AVMutableComposition()
    //合并视频、音频轨道
    let firstTrack = composition.addMutableTrack(
        withMediaType: AVMediaType.video, preferredTrackID: CMPersistentTrackID())
    let audioTrack = composition.addMutableTrack(
        withMediaType: AVMediaType.audio, preferredTrackID: CMPersistentTrackID())

    var insertTime: CMTime = CMTime.zero
    for asset in videoAssets {
        print("合并视频片段:\(asset)")
        do {
            try firstTrack?.insertTimeRange(
                CMTimeRangeMake(start: CMTime.zero, duration: asset.duration),
                of: asset.tracks(withMediaType: AVMediaType.video)[0] ,
                at: insertTime)
        } catch _ {
        }
        do {
            try audioTrack?.insertTimeRange(
                CMTimeRangeMake(start: CMTime.zero, duration: asset.duration),
                of: asset.tracks(withMediaType: AVMediaType.audio)[0] ,
                at: insertTime)
        } catch _ {
        }

        insertTime = CMTimeAdd(insertTime, asset.duration)
    }
    //旋转视频图像,防止90度颠倒
    firstTrack?.preferredTransform = CGAffineTransform(rotationAngle: CGFloat.pi/2)

    //获取合并后的视频路径
    let documentsPath = NSSearchPathForDirectoriesInDomains(.documentDirectory,
                                                            .userDomainMask,true)[0]
    let destinationPath = documentsPath + "/mergeVideo-\(arc4random()%1000).mp4"
    print("合并后的视频:\(destinationPath)")
    let videoPath = URL(fileURLWithPath: destinationPath as String)
    let exporter = AVAssetExportSession(asset: composition,
                                        presetName:AVAssetExportPresetHighestQuality)!
    exporter.outputURL = videoPath
    exporter.outputFileType = AVFileType.mp4
    exporter.shouldOptimizeForNetworkUse = true
    exporter.timeRange = CMTimeRangeMake(
        start: CMTime.zero,
        duration: CMTimeMakeWithSeconds(Float64(duration),
                                        preferredTimescale: framesPerSecond))
    exporter.exportAsynchronously(completionHandler: {
        //将合并后的视频保存到相册
        self.exportDidFinish(session: exporter)
    })
}
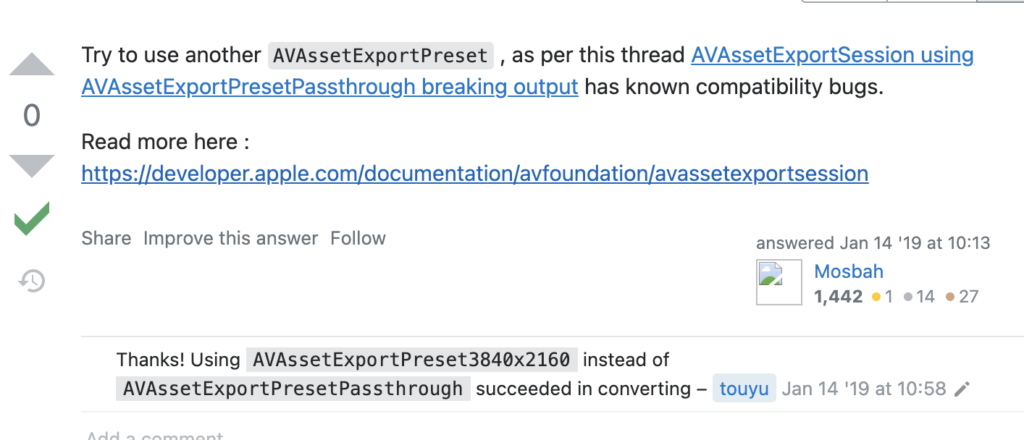
重要:发现用ios录制完导出的视频mov和mp4,在Chrome和火狐浏览器并不能播放出来,safari浏览器是可以的。
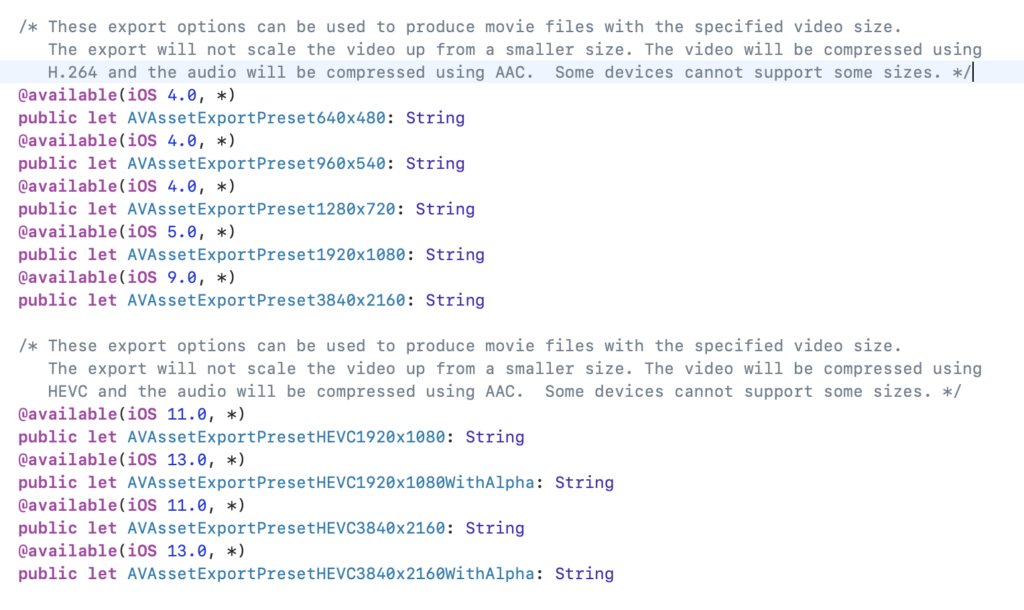
原因是,ios导出的视频默认是mp4的m4v格式的,这种格式一般的浏览器都不支持,除了safari。那么如何解决这个问题呢,可以在导出视频时,指定一下参数
Using AVAssetExportPreset3840x2160 instead of AVAssetExportPresetPassthrough
let exportSession: AVAssetExportSession = AVAssetExportSession.init(asset: asset2, presetName: AVAssetExportPreset3840x2160)!
https://developer.apple.com/documentation/avfoundation/avassetexportsession